03.02.15 — Journal
Homebrew Stencil Type
So yesterday, somewhat inspired by the talks at Leeds Print Festival, I decided to try my hand at a spot of printing! As this was a spontaneous decision, and because I was confined to working in my student house, I had to get a bit creative with my techniques and materials…
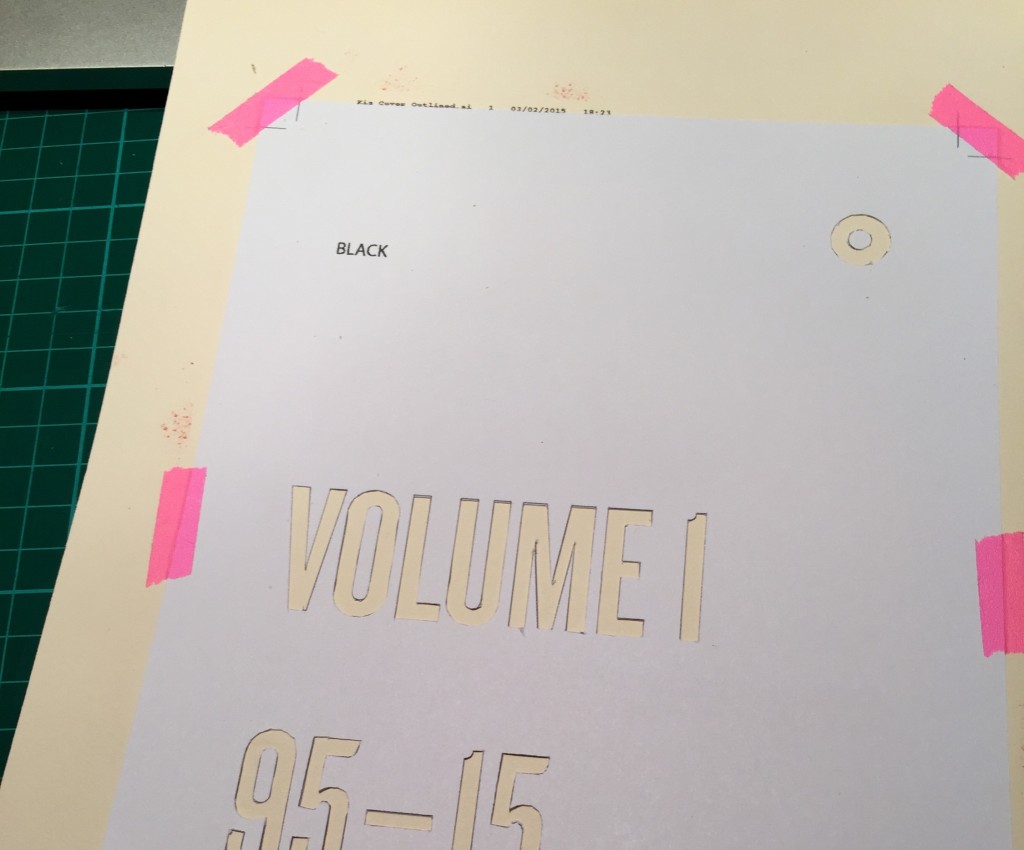
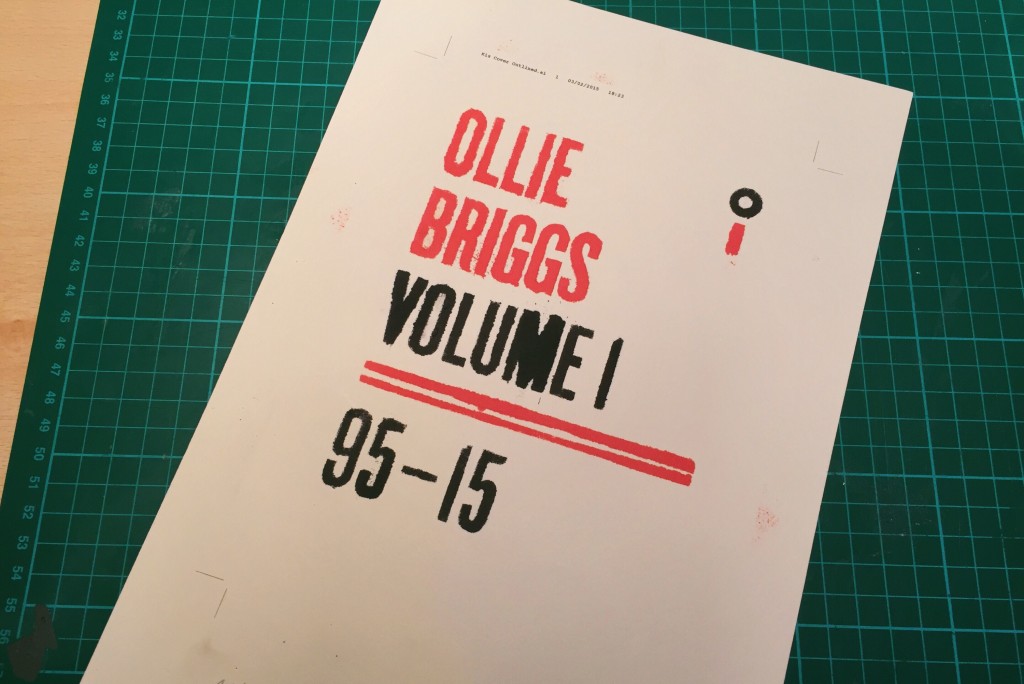
I decided to create a two-colour print using a rudimentary stencil technique. I firstly drew up my design (for a project I am working on in my spare time) and then split the document into a black layer and a colour layer. I then printed these two layers on two separate pieces of card before rather tediously cutting them out with a craft knife.
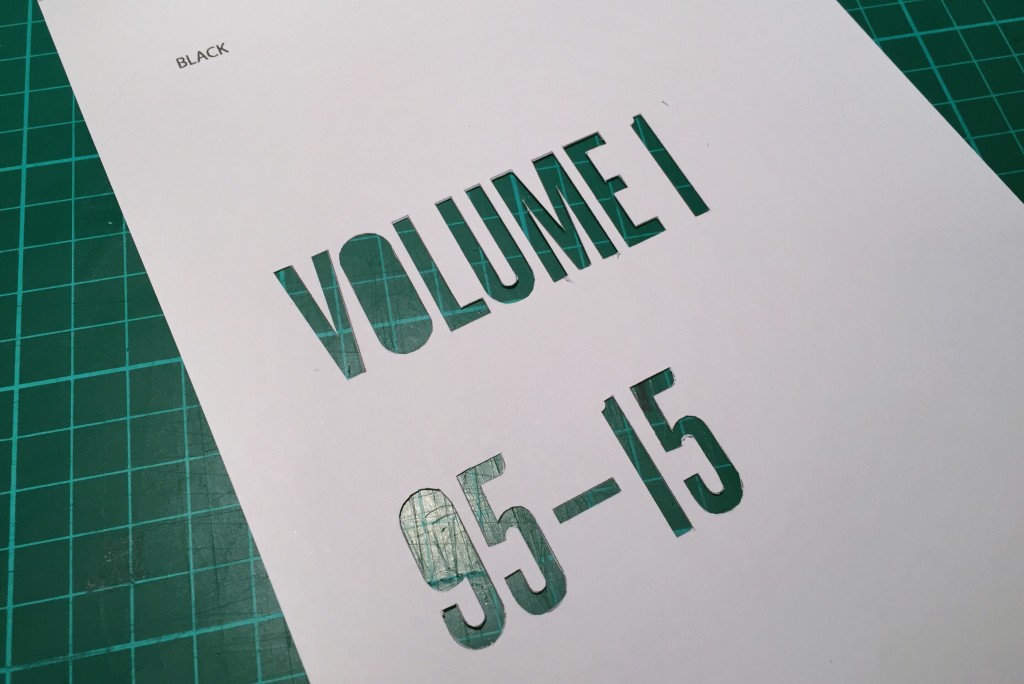
I had decided from the off to abandon my usual purist attitude and embrace any imperfections, so I wasn’t too bothered that the cutting was dodgy in certain areas. I did, however, want to retain the counters in the letterforms, so I cut those out also and then used some temporary glue to adhere them to the surface to be printed on before I put down the ink. I used crop marks printed on both the card to be printed on and the stencils themselves to align the stencils.

I then had to get creative all over again. I had no proper acrylic print medium, so I rooted through my drawers to see what I could find. I winded up making use of a set of inkjet printer cartridge refill pots which had been laying dormant in my drawer. Using the sponge end of a scourer from my kitchen cupboard, I doused it with the ink and then brushed the excess off on some spare paper before dabbing it repeatedly over the stencil.
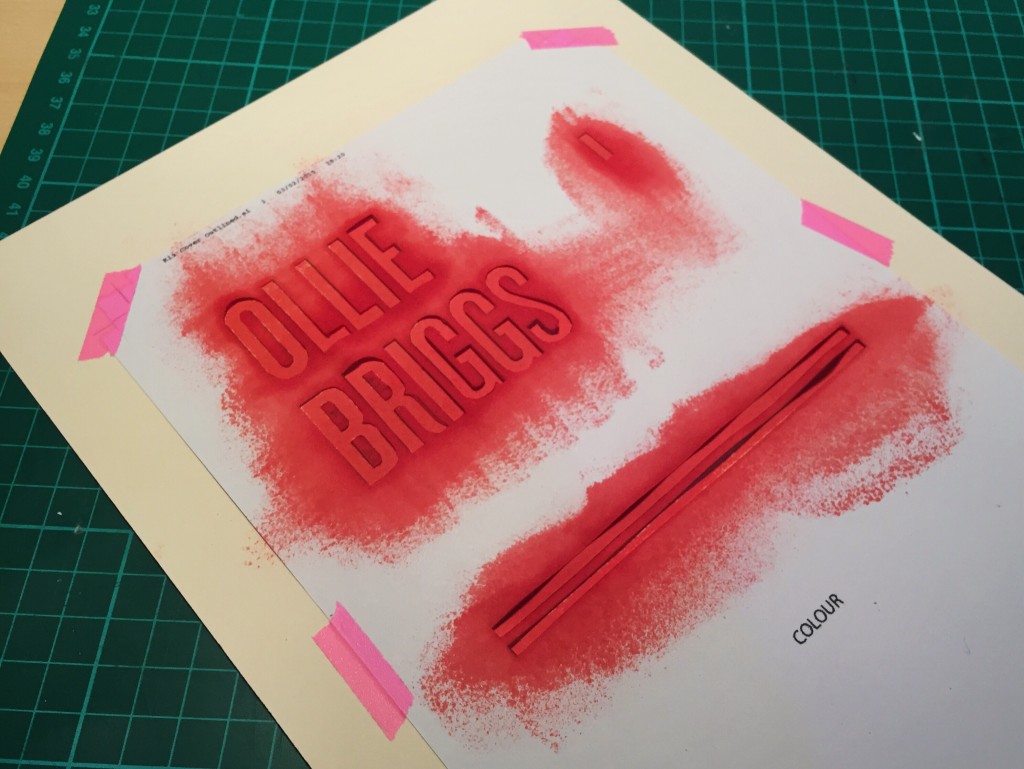
Again, I was aware that this kind of low viscosity ink wasn’t ideal for this method of printing, however I thought it’d add to the handmade appeal of the final outcome – and it was the only stuff I had lying around! I may rename this post “Stencil Type On A Shoestring.”
Anyway, those familiar with printing will know that there is no such thing as red inkjet ink, so the vibrant shade of red you see above is actually a custom mix of magenta and yellow ink.
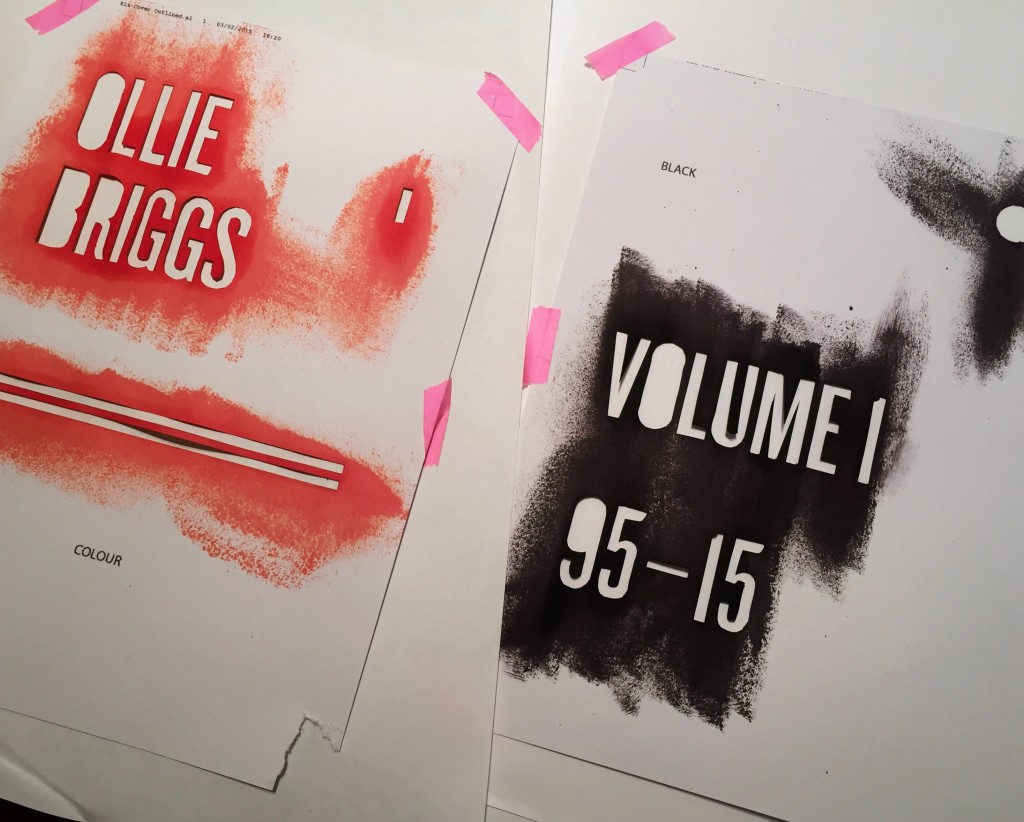
After applying the two colour prints and picking off the counters, I was presented with the final product! As I say, it’s not in any way perfect, but I do like how the ink has seeped beyond the boundaries of the stencils, most noticeably around sharp angles like those of the ‘V’ and the ‘M’.
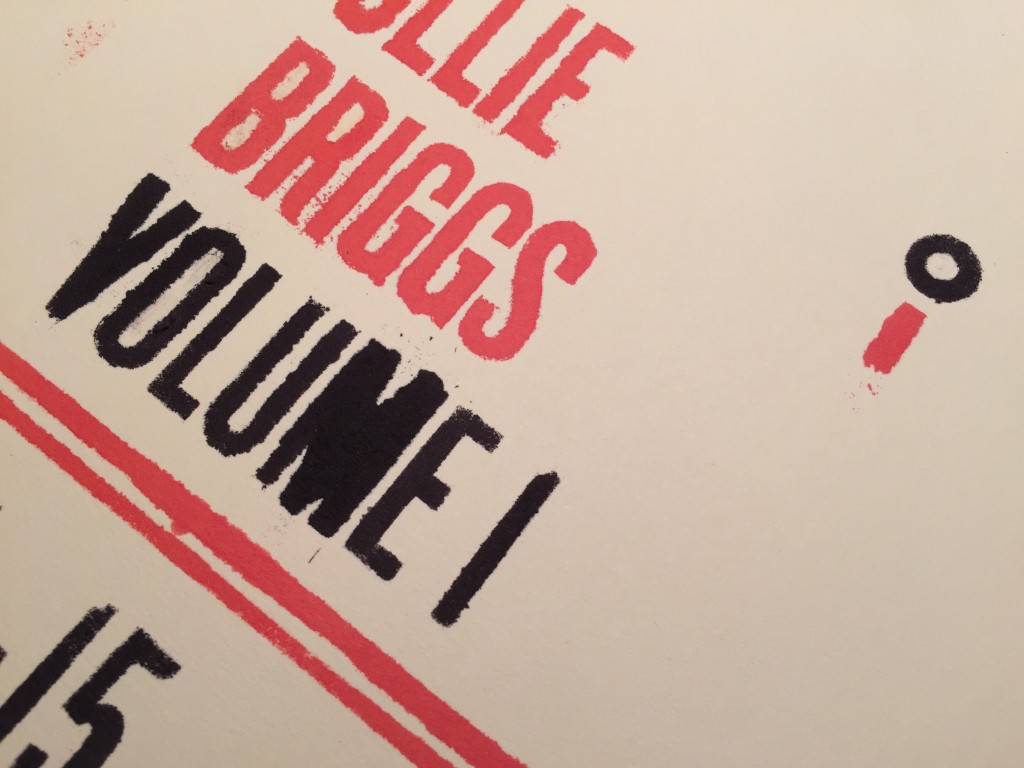
So there you have it – an unconventional technique using unconventional materials which resulted in quite a messy but interesting outcome. I am unable to photograph this, but the absorption of the ink by the paper has actually raised it slightly on the letterforms, giving the print a slightly embossed feel. I didn’t plan this but it’s an intriguing side effect of using such a watery ink.
The messy process took about two hours (most of which was spent cutting the letters out by hand), but it was great fun to do some typographic work without being sat behind a computer. Moan as I do about cutting each of the letters by hand, it was actually a great learning curve, as it instilled a newfound appreciation for the delicate forms of even the simplest typefaces.